Shadcn Studio Drag & Drop Builder Documentation
Learn how to visually assemble beautiful pages by combining blocks - no coding required.
Overview
The Drag & Drop Builder lets you create full pages - landing pages, marketing pages, pricing pages, and more - by picking pre-built blocks and arranging them into a layout. Everything is visual. When you're happy with the result, you can preview it, copy the install commands for your project, or download a ready-to-run Next.js project.
Head to Shadcn Studio Builder to get started.
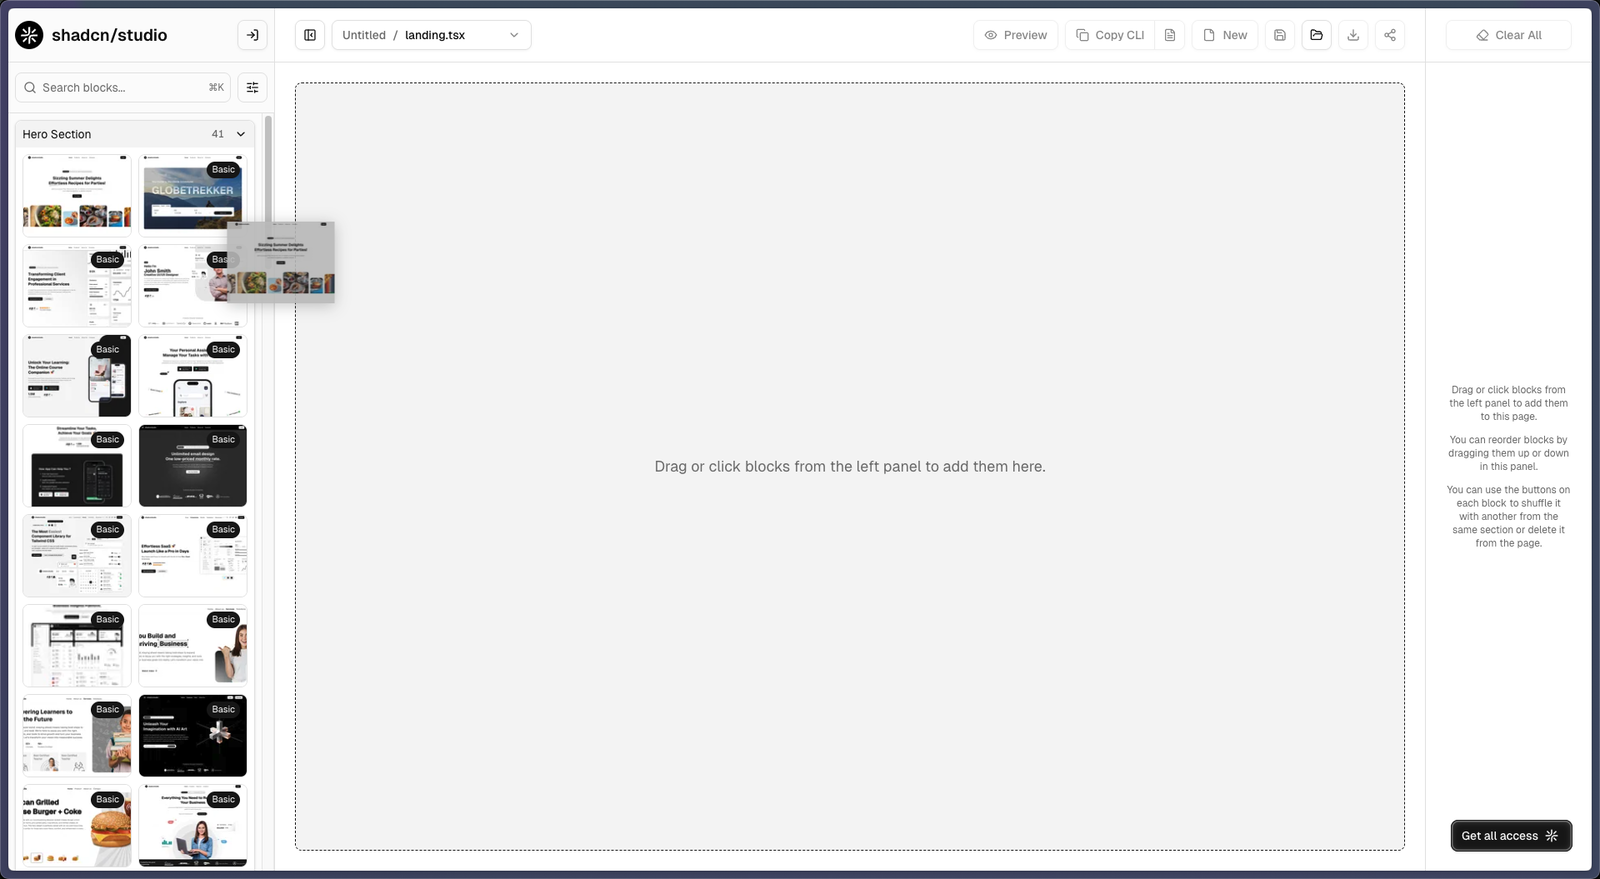
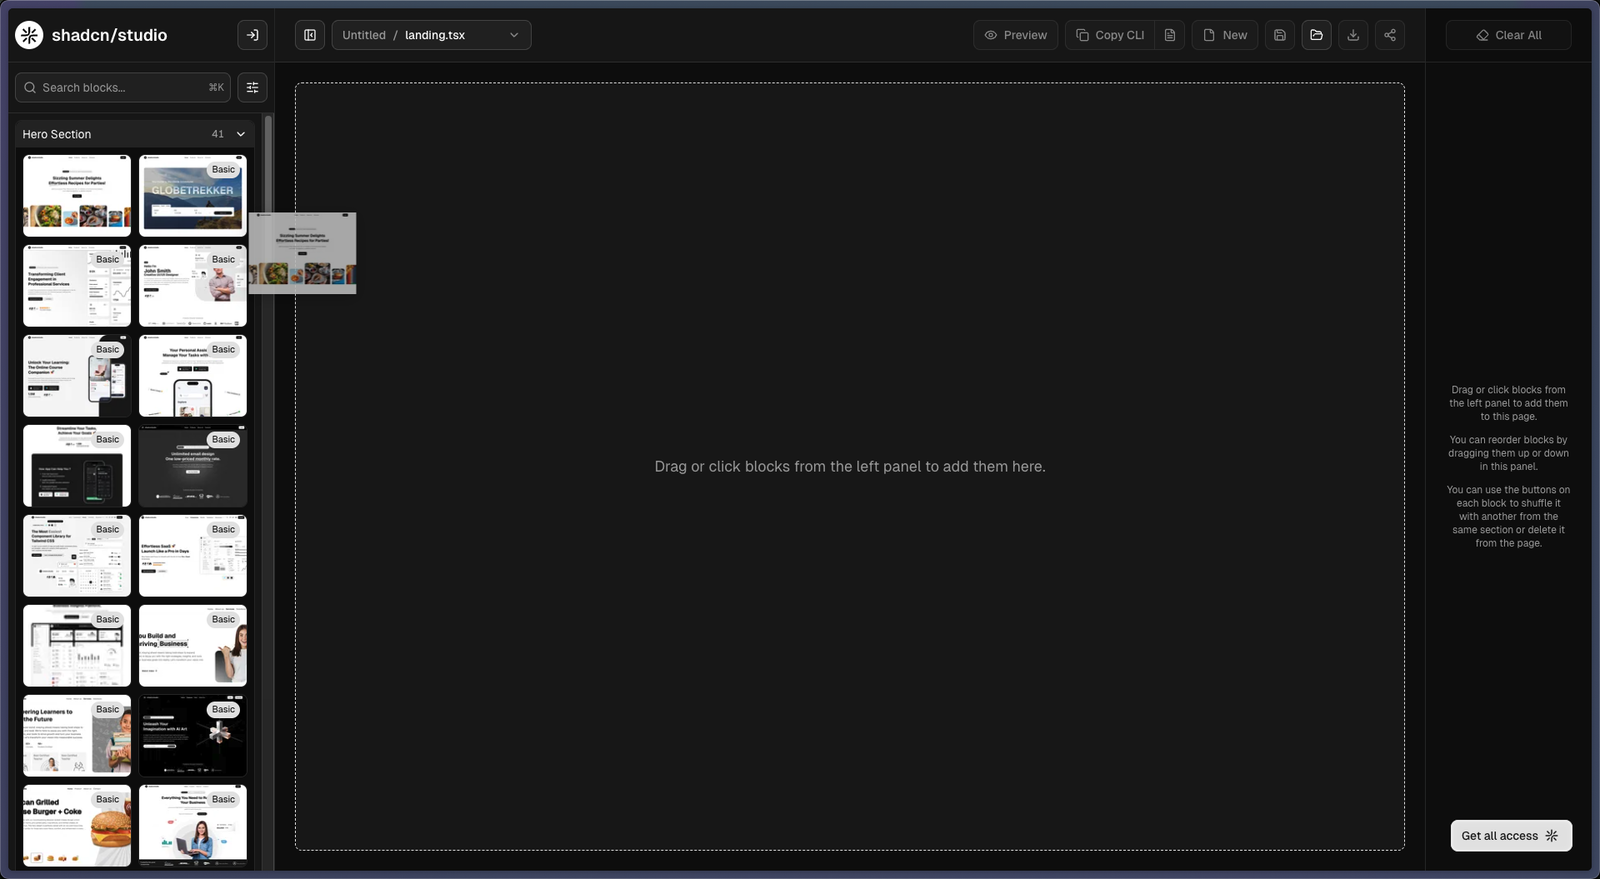
Adding Blocks to a Page
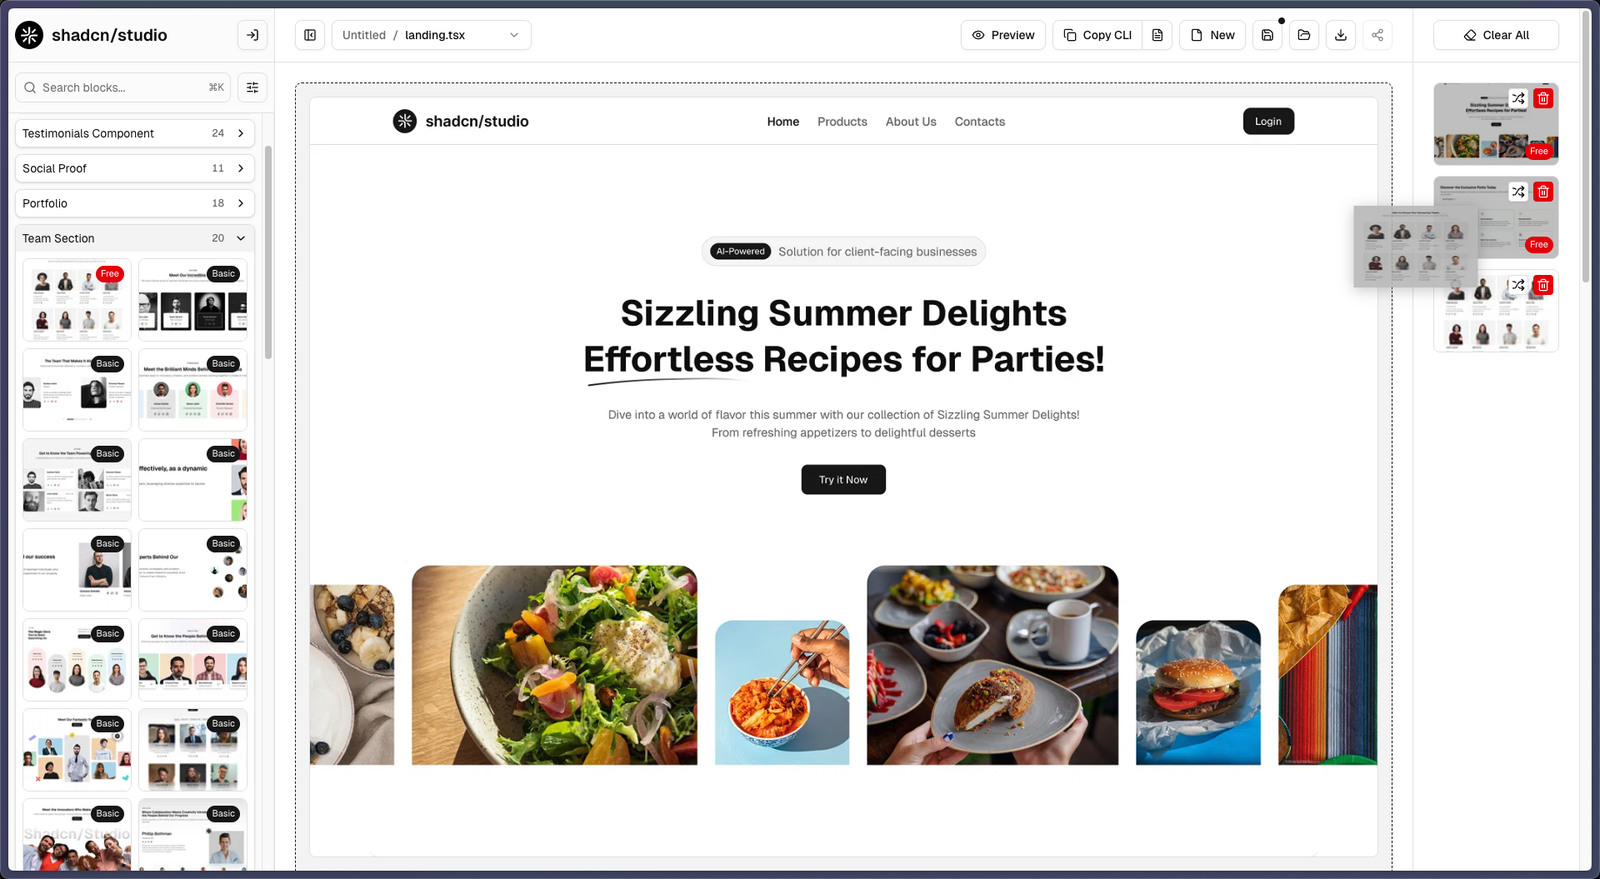
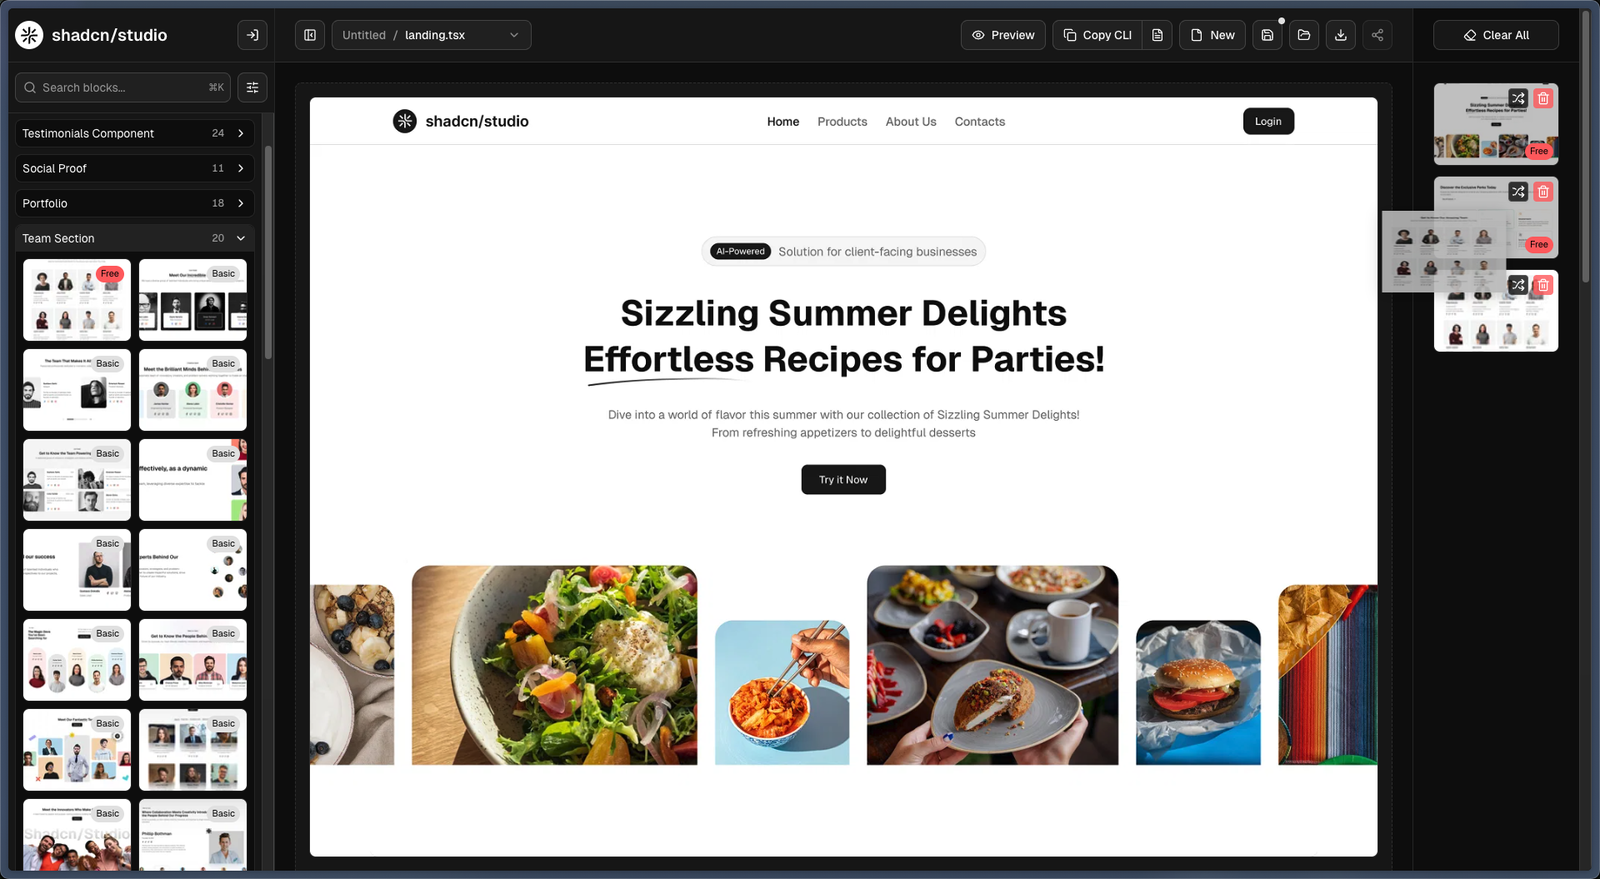
The left panel shows all available blocks, organized by section (e.g. Hero, Navbar, Features, Pricing, FAQ, Footer, etc.).
To add a block to your page, you can either:
- Click a block thumbnail - it gets added to the bottom of the page instantly
- Drag a block thumbnail from the left panel and drop it onto the canvas in the center
The center canvas updates immediately, showing a large preview image of each block in the order they appear on your page.
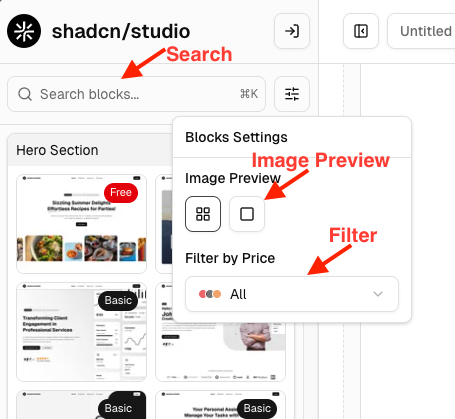
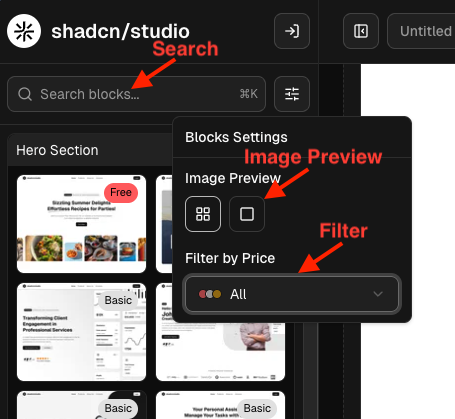
Filtering & Searching Blocks
Search: Type in the search bar at the top of the left panel to find blocks by name or section. Press ⌘K (Mac) or Ctrl+K (Windows) to jump to the search bar from anywhere. Press Escape to clear the search.
Filter by plan: Click the sliders icon next to the search bar to open Block Settings. Use the filter dropdown to show only Free, Basic, or Pro blocks, or show All.
Image preview size: In the same Block Settings panel, toggle between a two-column grid view or a single-column (larger) view for block thumbnails. The single-column view is useful when you want a closer look at a block before adding it.
Reordering Blocks
The right panel shows a compact list of all blocks currently on the active page. To reorder them, drag a block up or down within the right panel. The canvas updates in real time to reflect the new order.
Shuffling a Block
Each block in the right panel has a shuffle icon (two crossing arrows) in its top corner. Clicking it replaces that block with a random different block from the same section. For example, if you have a Hero block, shuffling it will swap it with another Hero variant. This is a quick way to explore alternatives without going back to the left panel.
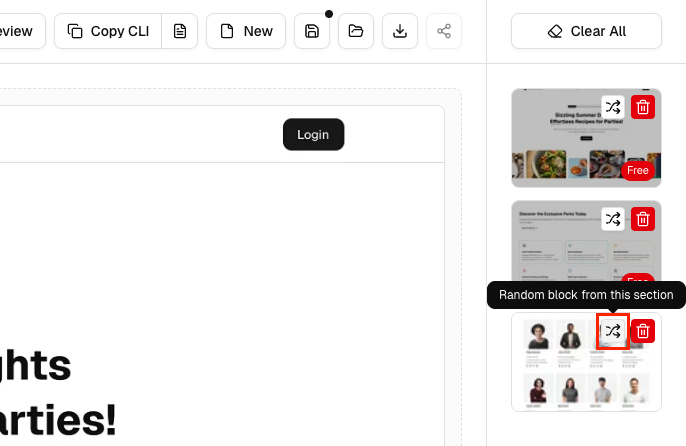

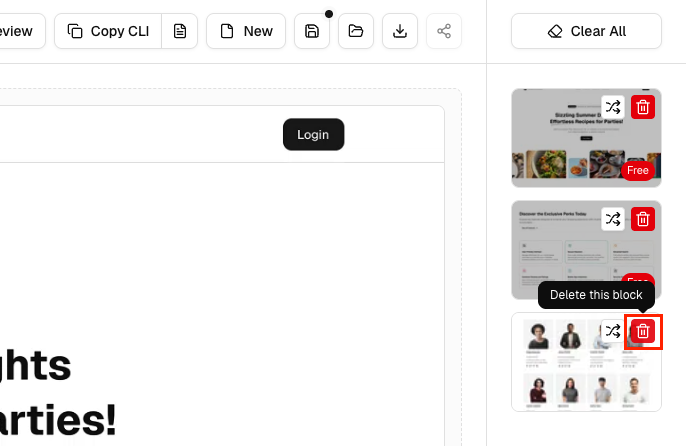
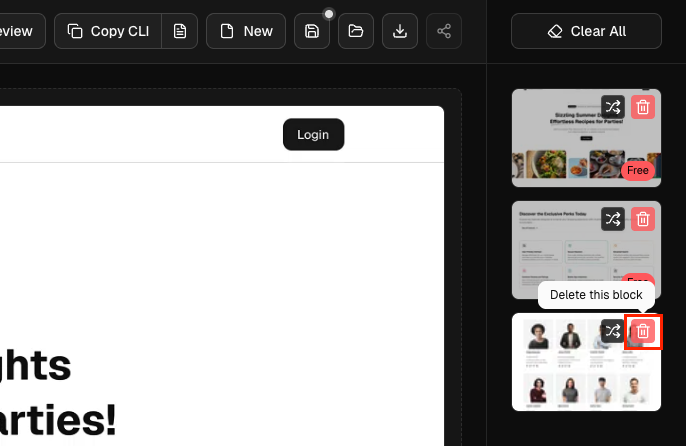
Deleting a Block
Each block in the right panel also has a red trash icon. Clicking it removes that block from the page. This cannot be undone, so make sure you want to remove it before clicking.
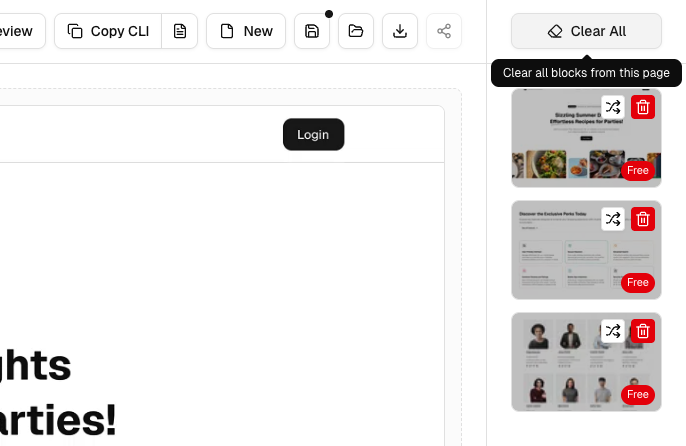
Clearing the Whole Page
At the top of the right panel, click Clear All to remove every block from the current page at once. A confirmation dialog will appear before anything is deleted.

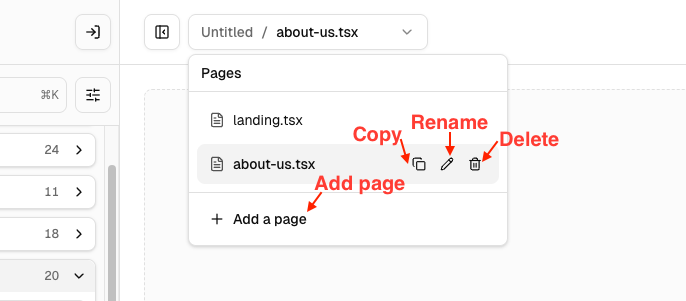
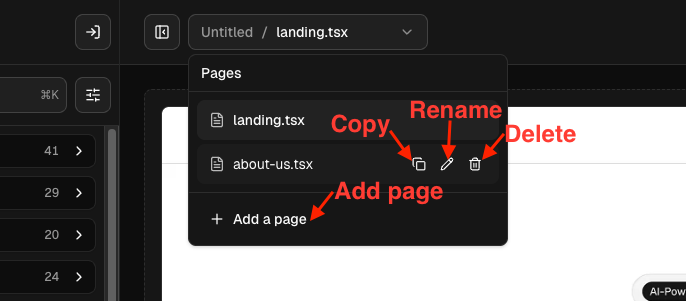
Managing Pages
Your project can have multiple pages (e.g. a landing page, an about page, a pricing page). All page management is done via the page selector button in the top header on the left side - it shows your current project name and active page name. Switching between pages is as simple as clicking the page name in the dropdown.
Add a page: Click the page selector, then click Add a page at the bottom of the dropdown. Enter a name and press Enter or click the add button.
Rename a page: Hover over a page in the dropdown and click the pencil icon. Edit the name and confirm by pressing Enter or clicking the check button.
Duplicate a page: Hover over a page and click the copy icon. A new page is created with the same blocks as the original.
Remove a page: Hover over a page and click the trash icon. It will ask for confirmation before deleting. You cannot remove the last remaining page.
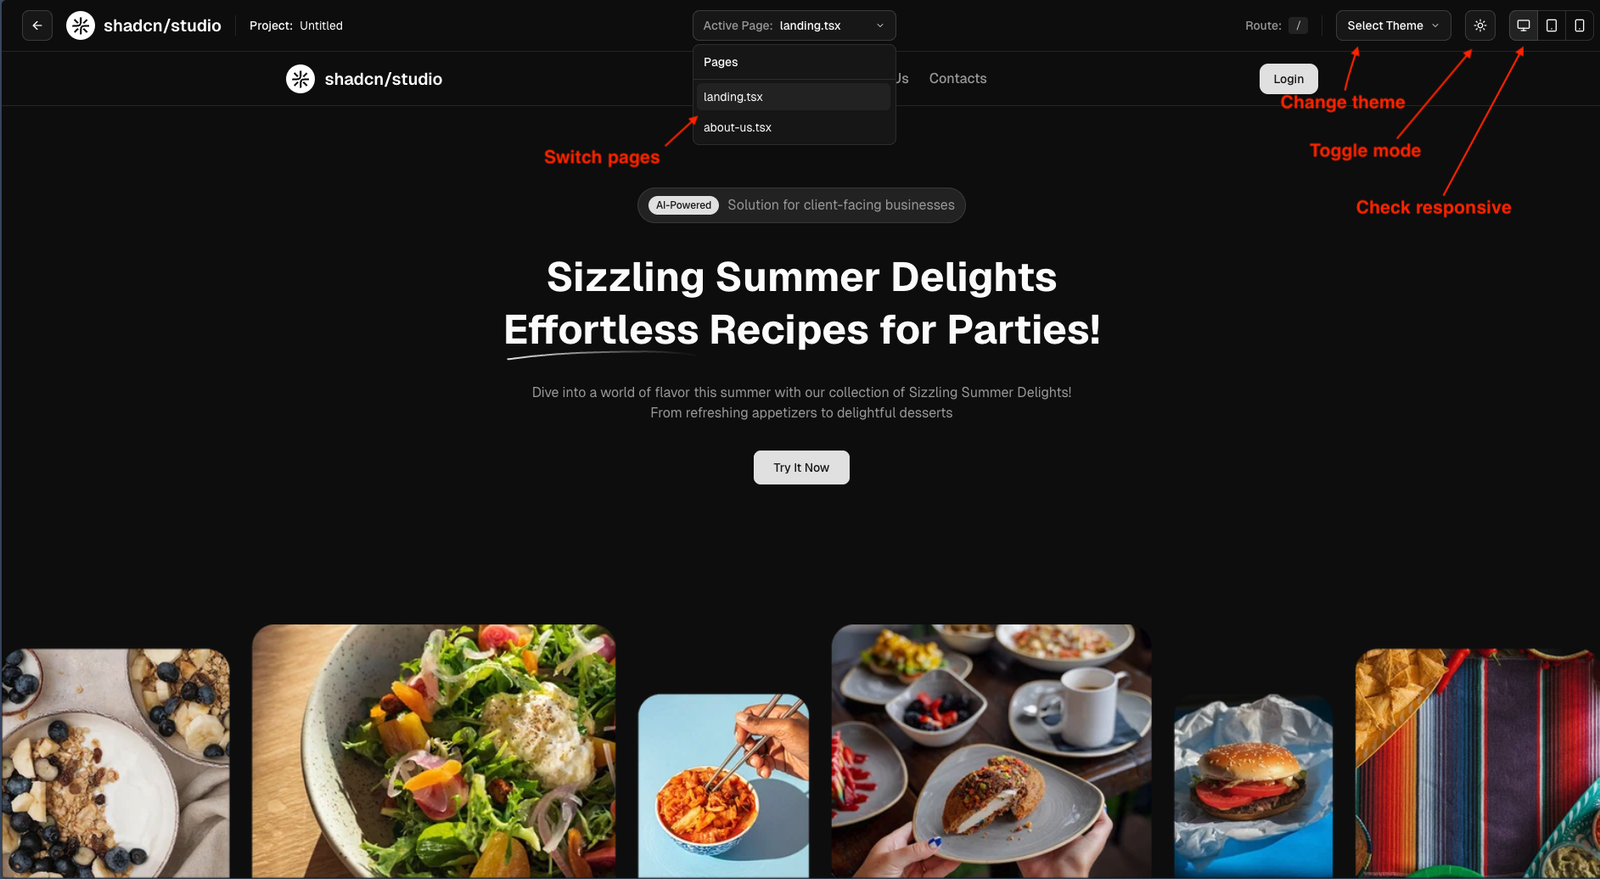
Previewing Your Page
Click the Preview button in the top header to open a live, fully rendered preview of your current project in a new tab.
Inside the preview you can:
- Switch pages using the Active Page dropdown in the preview header - no need to go back to the builder
- Change the theme using the Select Theme dropdown to see how your page looks with different color palettes
- Toggle light/dark mode with the moon/sun icon
- Check responsiveness using the device toggle (desktop, tablet, mobile icons) on the right side of the header - the preview resizes to simulate how the page looks on each device size

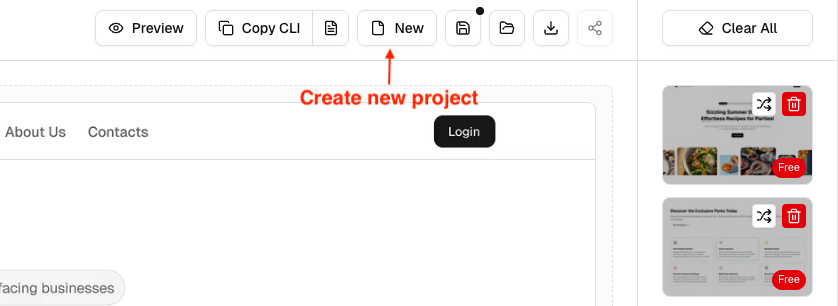
Projects
A project is a collection of pages and their blocks. You can have multiple projects - for example, one per client, or one per website.
Create a new project: Click New in the top header. If you have unsaved changes, a warning dialog will ask you to confirm before switching to a new project.
When to create a new project: Start a new project whenever you're building a separate website or want a clean slate. If you're just adding more pages to the same site, add a new page within the current project instead.

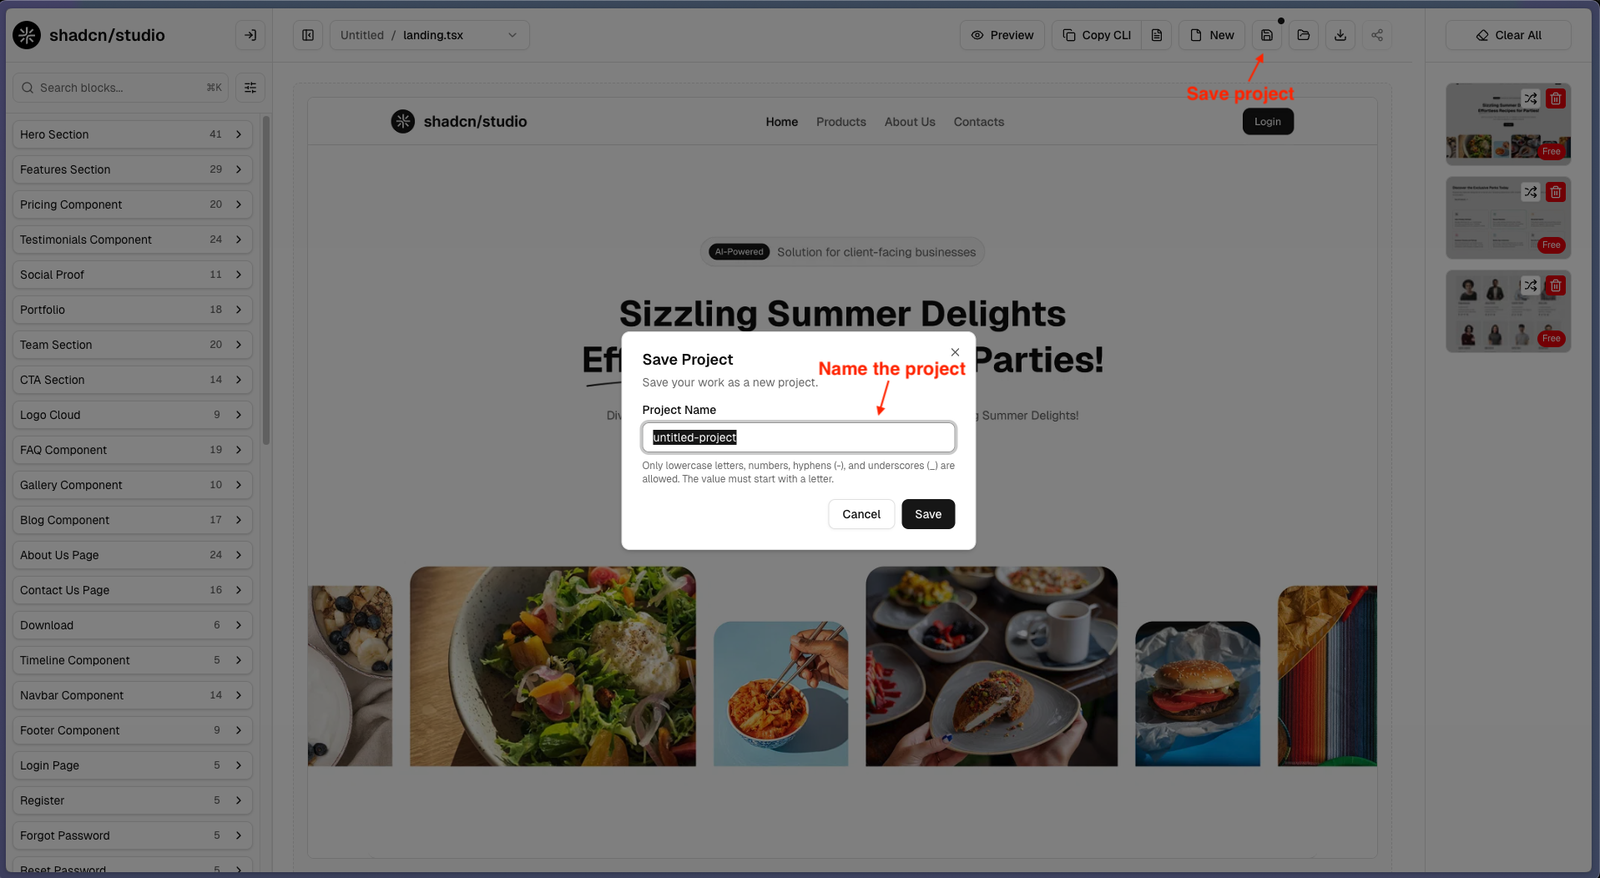
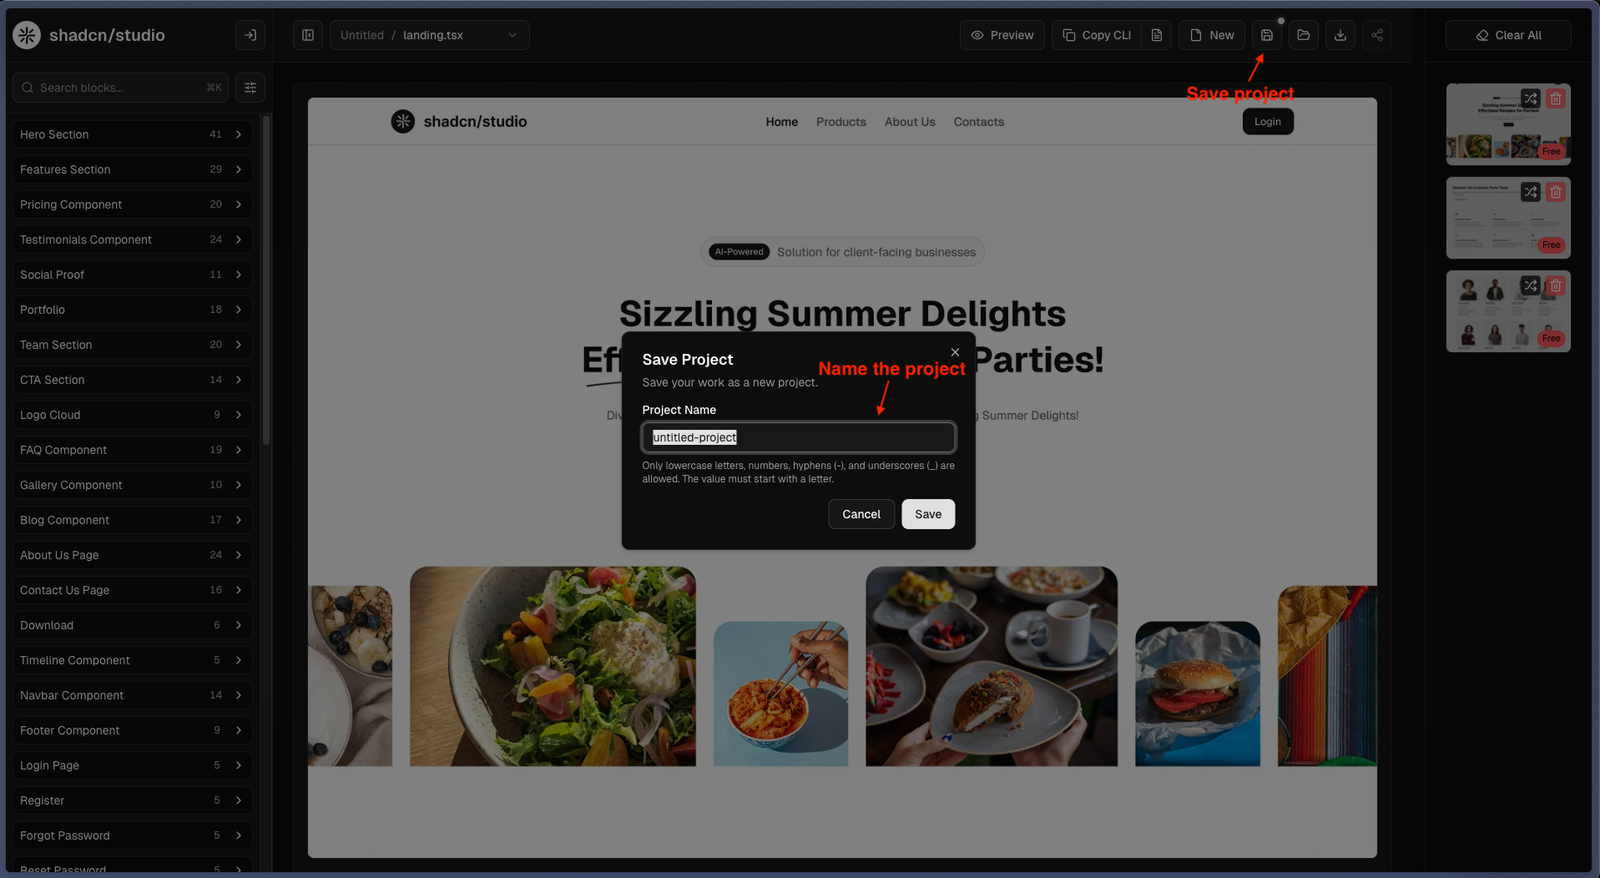
Saving a Project
Click Save (the floppy disk icon) in the top header. If it's the first save, you'll be prompted to give the project a name. After naming it, the project is saved to your browser's local storage if you have not logged in or have a basic plan.
If you've already saved the project and made further changes, clicking Save will show a prompt asking whether you want to save to the existing project or save as a new project.
A pulsing dot on the Save button means you have unsaved changes.
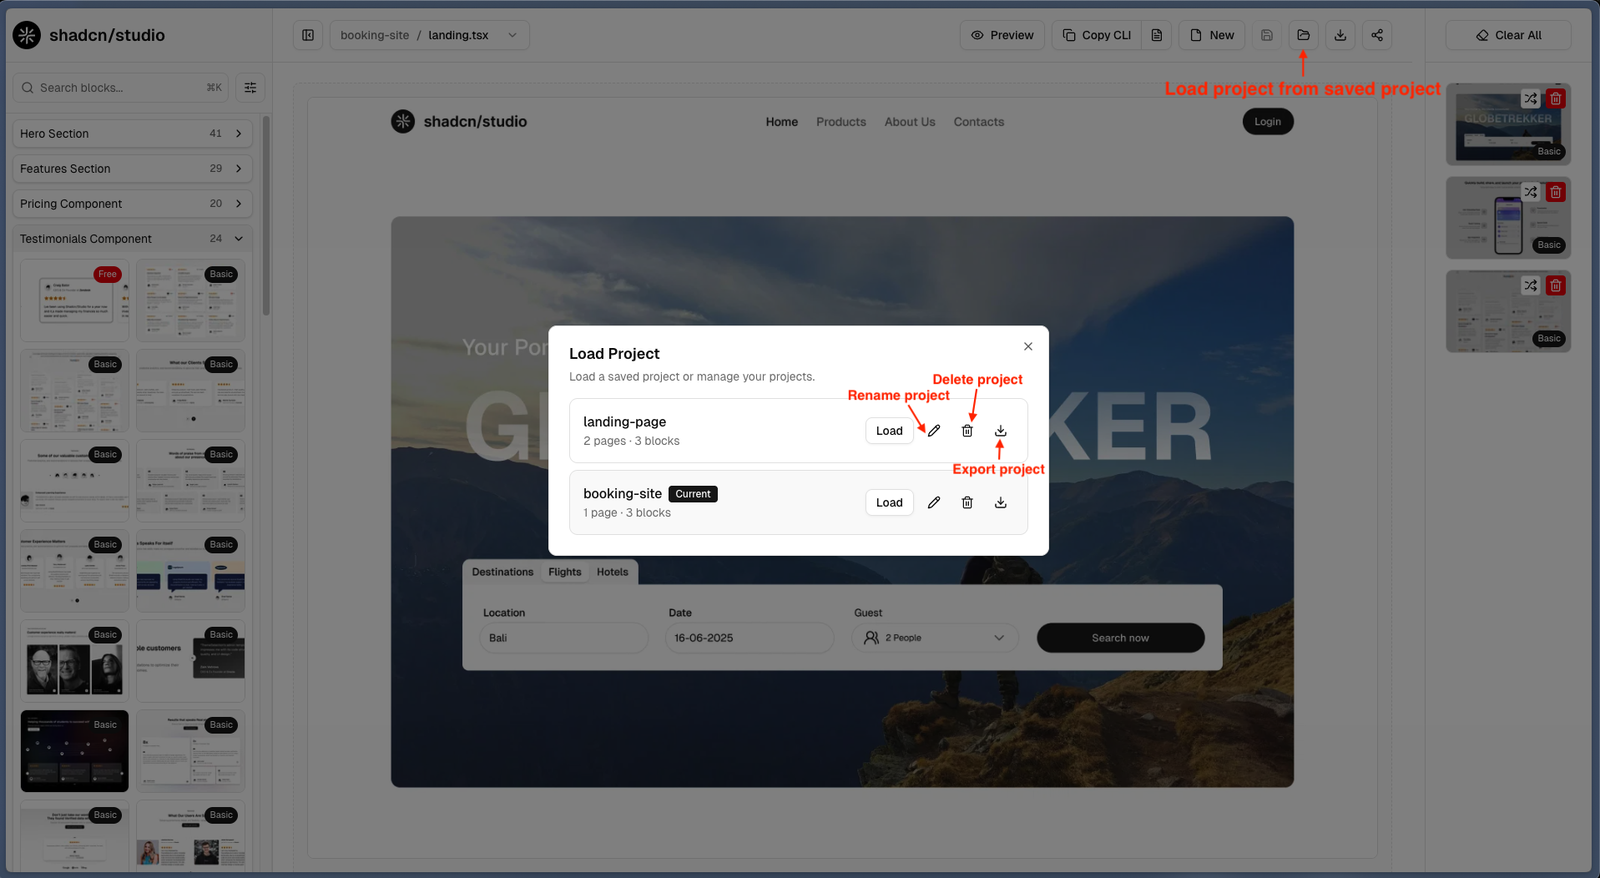
Loading a Saved Project
Click Load (the folder icon) in the top header to open the Load Project dialog. It lists all your saved projects. Click the Load button to load a project - this replaces the current canvas with the selected project's pages and blocks.
Rename a project: In the Load dialog, click the pencil icon next to a project to rename it.
Delete a project: In the Load dialog, click the trash icon next to a project to delete it. It will ask for confirmation before permanently deleting it.
Export from the dialog: You can also export any project directly from the Load dialog without loading it - click the download icon next to the project to export it.
The Local Badge
In the Load Project dialog, some projects show a Local badge. This means the project exists only in your browser's local storage and has not been synced to the cloud yet. You may see this if you saved a project while not logged in (or on a free plan) and then later signed in - the dialog will show both your local and cloud projects together.
If you're a Pro user, you'll also see an upload icon next to locally-stored projects. Clicking it syncs that project to the cloud without switching your current working project.
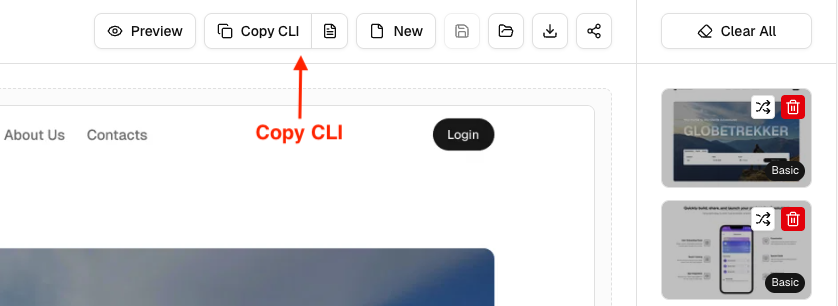
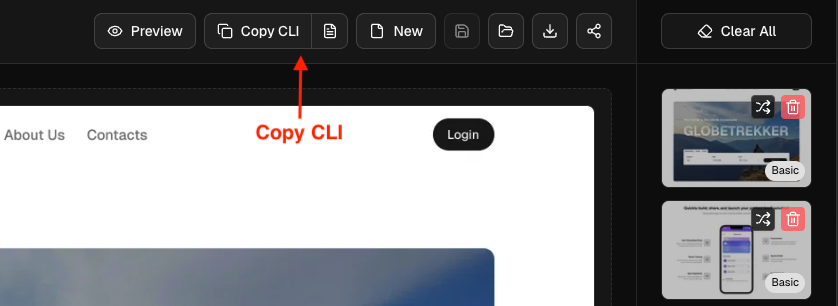
Copying the CLI Command
Click Copy CLI in the top header to copy the shadcn CLI install command for all blocks on the current active page.
What to do next: Open your terminal in your Next.js + shadcn/ui project and paste the command. The shadcn CLI will install all the required block files and their dependencies directly into your project. Once installed, copy the page's JSX into your route file. Refer to the How to use Shadcn CLI guide for full setup instructions.
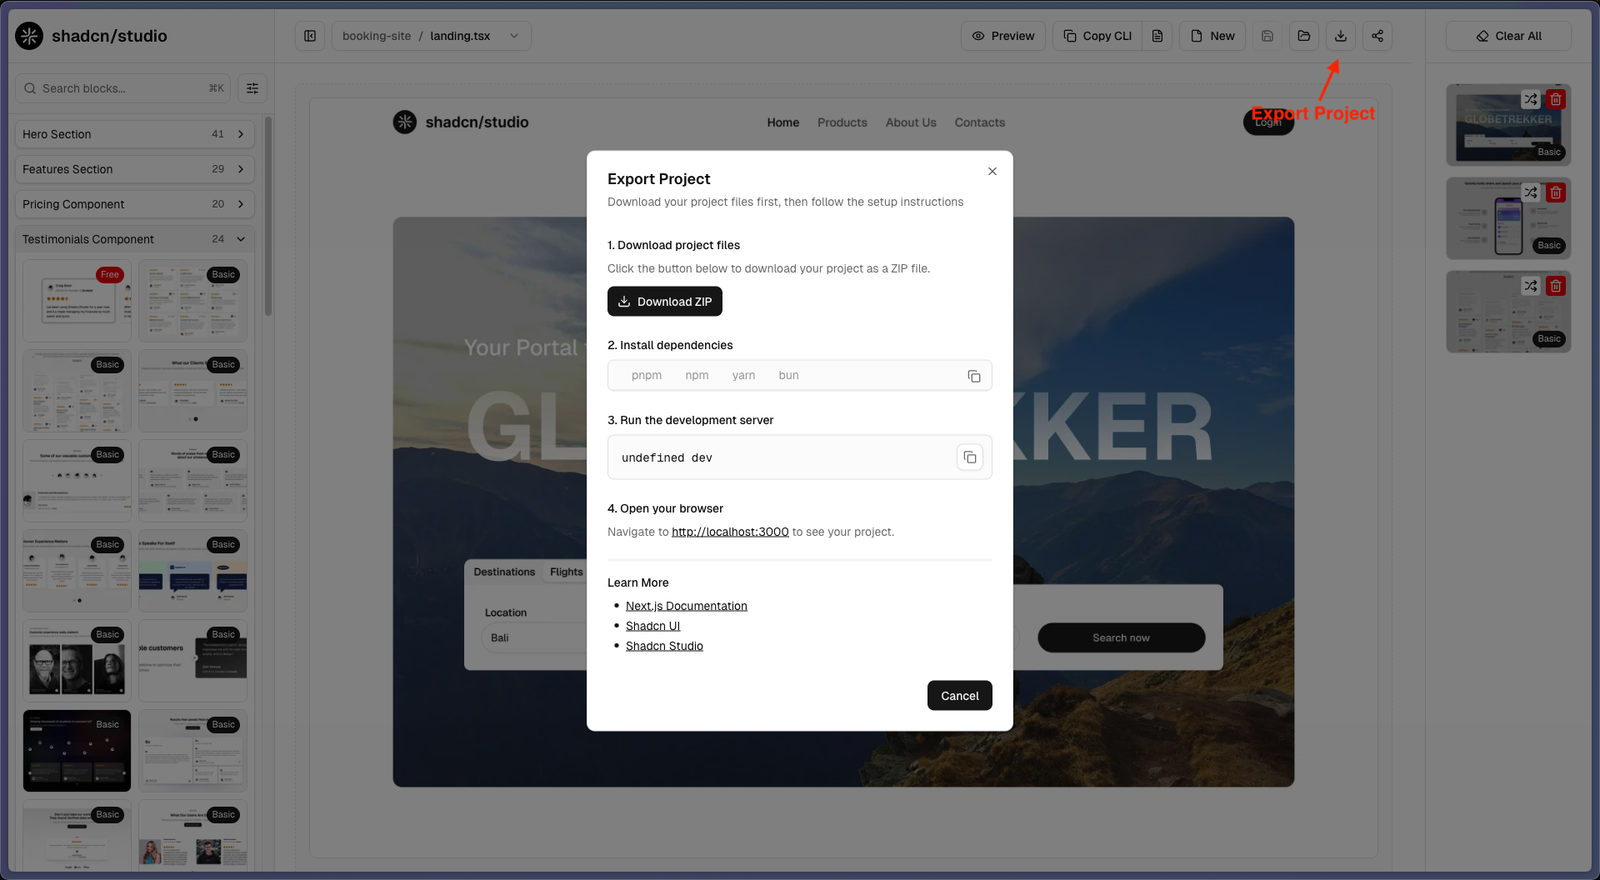
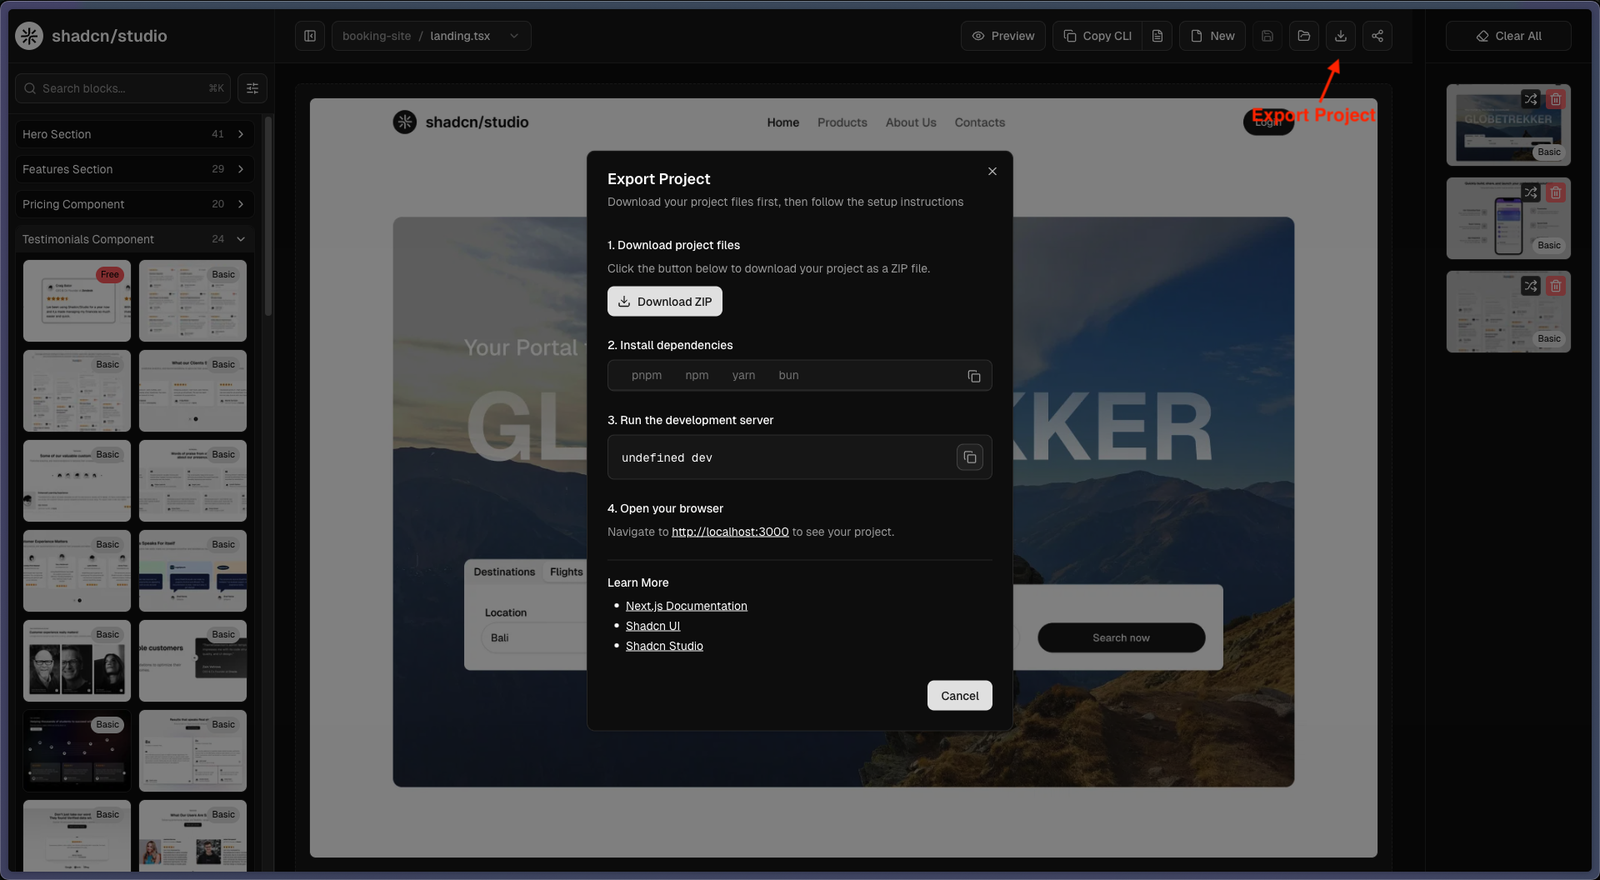
Exporting Your Project
Click Export (the download icon) to download a complete, ready-to-run Next.js project as a ZIP file containing all your pages, components, styles, and configuration. The export works whether or not the project has been saved - your current canvas state is exported as-is.
What's Included in the ZIP
- An
app/folder with apage.tsxfor each of your pages - All block component files under
components/ - A
globals.csswith all the theme and CSS variables your blocks need - A
package.jsonwith all required dependencies - A
components.jsonpre-configured for shadcn - A
.gitignoreand other standard project files
The components.json and a .env file are pre-filled with your registry credentials so your exported project is ready to install further blocks without any extra setup.
What to Do Next
These steps are also shown inside the export dialog, but here's the full flow:
- Unzip the downloaded file and open the folder in your code editor and terminal.
- Run
npm install(orpnpm install) to install all dependencies. - Run the shadcn CLI command shown in the export dialog to install all required block components into your project.
- Run
npm run devto start the local development server and preview your project. - When ready, deploy to Vercel, Netlify, or any other Next.js-compatible hosting platform.
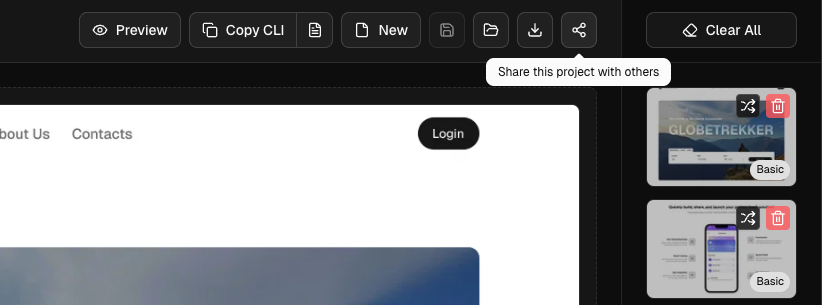
Sharing a Project Pro
Click Share (the share icon) in the top header to generate a public shareable link for your current project. Anyone with the link can open a read-only live preview - no account required on their end.