Artificial intelligence is moving faster than ever, and developers everywhere are trying to bring real AI features into their apps. But integrating AI models directly is complex. Every provider has its own API, its own request structure, its own way of handling streaming, errors, and file uploads, and the list goes on. That’s where the AI SDK can help you.
In this guide, we’ll explore how the AI SDK and AI Elements work together, and then build a YouTube Thumbnail Generator using Next.js, shadcn/ui, and Vercel’s AI Gateway.
Let’s get started.
Table of Contents
What is the AI SDK?
The AI SDK is a TypeScript toolkit designed to simplify AI application development across popular frameworks like React, Next.js, Vue, Svelte, and Node.js. Just change one line of code. No rewrites. No API mismatches. No headaches.
Just one line of code to switch the provider. Easy, no fluff. The AI SDK standardizes integrating artificial intelligence (AI) models across supported providers. This enables developers to focus on building great AI applications, not waste time on technical details.
The Problem It Solves
Imagine you’re building a chatbot. You start with OpenAI’s GPT-4, but later want to experiment with Anthropic’s Claude or Google’s Gemini. Without the AI SDK, you’d need to rewrite significant portions of your code for each provider’s unique API. The AI SDK eliminates this friction by offering a unified interface that works seamlessly across all supported providers.
What are AI Elements?
AI Elements are pre-built, composable UI components designed specifically for AI interactions. These elements are build with shadcn/ui. It provides all the basic UI elements for building AI applications like Prompt Input, Tool call, Suggestions, Model Selector, etc. Please refer to official docs.
It includes:
- Conversation components for chat-like interfaces
- Prompt input components for user input handling
- Attachment support for multi-modal interactions
- Loading states and empty states
Now, we have the basic idea of the AI SDK. Let’s see how we can build AI-powered apps with it. In this article, we will build a YouTube thumbnail generator that generates beautiful thumbnails for your YouTube video.
Prerequisites
Before we start, please check out the prerequisites for building the project
- A Next.js project with Shadcn setup (setup guide)
- A Vercel Account
Let’s start building our application, the YouTube Thumbnail Generator. For building this, we need to have access to the API of any LLM like Claude, OpenAI, or Gemini. To get access to the api, you need to purchase the credits from the respective LLM provider, or you can use AI Gateway by Vercel.
What is AI Gateway?
Vercel AI Gateway is a unified API endpoint that lets you access many different AI / LLM models from a variety of providers through a single interface. Instead of switching separate API keys & integrations for each provider, you just send requests to the Gateway, and it routes them to the appropriate model provider. Please refer to the official docs for more details.
AI Gateway provides 5$ free credit/month, which is enough for playing with multiple providers and the AI SDK. For getting free credits, you need to add a credit card to your Vercel account. Don’t worry, you won’t be charged until you purchase the credit.
For this project, we will use the AI Gateway for our model provider. As it provides enough credits for free, you can also follow along with the article.
By this, you have grabbed the free credits by ai gateway and also set up the Nextjs Shadcn project.
Let’s Build: AI YouTube Thumbnail Generator
In this tutorial, we will see how the AI SDK, AI Elements, and shadcn/ui make it easy to build AI-powered applications. Instead of dealing with multiple APIs, models, and complex streaming logic, the AI SDK provides a unified interface that works across all major LLM providers.
Through this guide, you will also learn how AI Elements offers ready-to-use, polished UI components designed specifically for AI interactions—conversation views, prompt inputs, attachment handling, loading states, and more.
Step 1: Install ai-sdk
Install AI-SDK in your project by running the following command:
pnpm add aiStep 2: Build the UI for the YouTube thumbnail Generator
Let’s build the UI for the YouTube thumbnail generator. We will use the AI Elements for building UI, faster.
Run the below command to install all the required UI elements from Shadcn and ai-elements.
npx shadcn@latest add empty @ai-elements/conversation @ai-elements/loader @ai-elements/prompt-inputCreate a new component ThumbnailGenerator.tsx in components directory and paste the code in ThumbnailGenerator.tsx .
"use client";
import {
Conversation,
ConversationContent,
ConversationEmptyState,
ConversationScrollButton,
} from "@/components/ai-elements/conversation";
import { Loader } from "@/components/ai-elements/loader";
import {
PromptInput,
PromptInputAttachment,
PromptInputAttachments,
PromptInputButton,
PromptInputFooter,
type PromptInputMessage,
PromptInputSubmit,
PromptInputTextarea,
PromptInputTools,
usePromptInputAttachments,
} from "@/components/ai-elements/prompt-input";
import {
Empty,
EmptyContent,
EmptyDescription,
EmptyHeader,
EmptyMedia,
EmptyTitle,
} from "@/components/ui/empty";
import { ImageIcon, PaperclipIcon, SparklesIcon } from "lucide-react";
import { type FormEvent, useState } from "react";
const EmptyState = () => (
<Empty className="mx-auto max-w-2xl">
<EmptyHeader>
<EmptyMedia variant="icon">
<div className="-space-x-1 flex">
<div className="mt-1 flex size-12 items-center justify-center rounded-full border bg-white p-1 shadow-sm dark:bg-card">
<ImageIcon className="size-6" />
</div>
<div className="flex size-12 items-center justify-center rounded-full border bg-white p-1 shadow-sm dark:bg-card">
<SparklesIcon className="size-6" />
</div>
</div>
</EmptyMedia>
<EmptyTitle>YouTube Thumbnail Generator</EmptyTitle>
<EmptyDescription>
Create eye-catching thumbnails for your videos in seconds. Just describe
your idea and let AI do the rest.
</EmptyDescription>
</EmptyHeader>
<EmptyContent>
<div className="space-y-2">
<p className="font-medium text-sm">Try something like:</p>
<ul className="space-y-1 text-muted-foreground text-sm">
<li>Tech review with shocked face and iPhone</li>
<li>Gaming thumbnail with neon Fortnite style</li>
<li>Cooking video with delicious pizza</li>
</ul>
</div>
</EmptyContent>
</Empty>
);
type ConversationEntry = {
id: string;
prompt: string;
attachments?: { url: string; filename?: string; mediaType?: string }[];
imageData?: string;
isLoading: boolean;
};
export function ThumbnailGenerator() {
const [prompt, setPrompt] = useState("Create a YouTube thumbnail for video of how to solve a Rubik's cube");
const [conversations, setConversations] = useState<ConversationEntry[]>([]);
const handleSubmit = async (
message: PromptInputMessage,
event: FormEvent<HTMLFormElement>
) => {
event.preventDefault();
if (!message.text?.trim()) return;
const entryId = crypto.randomUUID();
const newEntry: ConversationEntry = {
id: entryId,
prompt: message.text.trim(),
attachments: message.files?.map((file) => ({
url: file.url || "",
filename: file.filename,
mediaType: file.mediaType,
})),
isLoading: true,
};
setConversations((prev) => [...prev, newEntry]);
setPrompt("");
try {
// Prepare files data for API
const filesData = message.files?.map((file) => ({
url: file.url,
mediaType: file.mediaType,
filename: file.filename,
}));
const response = await fetch("/api/image", {
method: "POST",
headers: {
"Content-Type": "application/json",
},
body: JSON.stringify({
prompt: message.text.trim(),
files: filesData,
}),
});
const data = await response.json();
setConversations((prev) =>
prev.map((entry) =>
entry.id === entryId
? { ...entry, imageData: data.imageUrl, isLoading: false }
: entry
)
);
} catch {
setConversations((prev) =>
prev.map((entry) =>
entry.id === entryId ? { ...entry, isLoading: false } : entry
)
);
}
};
const isAnyLoading = conversations.some((entry) => entry.isLoading);
return (
<div className="relative mx-auto size-full h-screen max-w-2xl p-6 pt-12">
<div className="flex h-full flex-col">
<Conversation className="flex-1">
<ConversationContent>
{conversations.length === 0 ? (
<ConversationEmptyState>
<EmptyState />
</ConversationEmptyState>
) : (
conversations.map((entry) => (
<div key={entry.id} className="space-y-4">
{/* User prompt */}
<div className="flex justify-end">
<div className="max-w-[80%] space-y-2">
{/* Show attached images */}
{entry.attachments && entry.attachments.length > 0 && (
<div className="flex flex-wrap justify-end gap-2">
{entry.attachments.map((attachment, idx) =>
attachment.mediaType?.startsWith("image/") ? (
<img
key={idx}
src={attachment.url}
alt={attachment.filename || "Attached image"}
className="max-h-24 rounded-lg border object-cover"
/>
) : (
<div
key={idx}
className="flex items-center gap-2 rounded-lg border bg-muted px-3 py-2 text-sm"
>
<PaperclipIcon className="size-4" />
{attachment.filename || "Attachment"}
</div>
)
)}
</div>
)}
<div className="rounded-2xl bg-primary px-4 py-2 text-primary-foreground">
<p className="text-sm">{entry.prompt}</p>
</div>
</div>
</div>
{/* Generated image or loading */}
<div className="flex justify-start">
<div className="max-w-[80%]">
{entry.isLoading ? (
<div className="flex items-center gap-2 rounded-2xl border bg-muted px-4 py-3">
<Loader />
<span className="text-muted-foreground text-sm">
Generating image...
</span>
</div>
) : entry.imageData ? (
<div className="overflow-hidden rounded-2xl border">
<img
src={`data:image/jpeg;base64,${entry.imageData}`}
alt={`Generated: ${entry.prompt}`}
className="max-w-full"
/>
</div>
) : (
<div className="rounded-2xl border bg-muted px-4 py-2 text-muted-foreground">
<p className="text-sm">Failed to generate image</p>
</div>
)}
</div>
</div>
</div>
))
)}
</ConversationContent>
<ConversationScrollButton />
</Conversation>
<PromptInput
className="relative mt-4 w-full"
onSubmit={handleSubmit}
accept="image/*"
multiple
>
<PromptInputAttachments>
{(attachment) => <PromptInputAttachment data={attachment} />}
</PromptInputAttachments>
<PromptInputTextarea
onChange={(e) => setPrompt(e.currentTarget.value)}
placeholder="Describe the image you want to generate..."
value={prompt}
/>
<PromptInputFooter>
<PromptInputTools>
<AttachImageButton />
</PromptInputTools>
<PromptInputSubmit
disabled={!prompt.trim()}
status={isAnyLoading ? "submitted" : "ready"}
/>
</PromptInputFooter>
</PromptInput>
</div>
</div>
);
}
// Separate component to use the usePromptInputAttachments hook inside PromptInput
function AttachImageButton() {
const attachments = usePromptInputAttachments();
return (
<PromptInputButton
onClick={() => attachments.openFileDialog()}
aria-label="Attach image"
>
<PaperclipIcon className="size-4" />
</PromptInputButton>
);
}Important
- Create a UI using the AI elements and Shadcn
handleSubmitfunction handles the form submission & sends prompt to AIEmptyStateDisplays initial state with example prompts
Step 3: Build the API for handling image generation
Now, we will build a api endpoint for handling LLM requests and responses. Create a new route in /api/image/route.ts. For generating the image, we will use the model: “gemini-2.5-flash-image-preview”.
Paste the code below in the file:
import { generateText, type FilePart, type TextPart } from "ai";
import { createErrorResponse } from "../../../lib/request-utils";

type FileInput = {
  url: string;
  mediaType: string;
  filename?: string;
};

/**
 * POST handler for ai-elements-image
 *
 * Note: Rate limiting is handled at the route wrapper level
 * See: app/(view)/view/[name]/api/[...slug]/route.ts
 */
export async function POST(req: Request) {
  try {
    const { prompt, files }: { prompt: string; files?: FileInput[] } =
      await req.json();

    // Build message parts: images first, then text prompt
    const messageParts: (FilePart | TextPart)[] = [];

    // Add attached images as file parts
    if (files && files.length > 0) {
      for (const file of files) {
        if (file.url && file.mediaType?.startsWith("image/")) {
          // Handle both data URLs and blob URLs
          if (file.url.startsWith("data:")) {
            // Extract base64 from data URL
            const base64Match = file.url.match(/^data:[^;]+;base64,(.+)$/);
            if (base64Match) {
              messageParts.push({
                type: "file",
                data: base64Match[1],
                mediaType: file.mediaType as
                  | "image/jpeg"
                  | "image/png"
                  | "image/gif"
                  | "image/webp",
              });
            }
          } else {
            // For regular URLs, use the URL directly
            messageParts.push({
              type: "file",
              data: new URL(file.url),
              mediaType: file.mediaType as
                | "image/jpeg"
                | "image/png"
                | "image/gif"
                | "image/webp",
            });
          }
        }
      }
    }

    // Add text prompt
    messageParts.push({
      type: "text",
      text: prompt,
    });

    const result = await generateText({
      model: "google/gemini-2.5-flash-image-preview",
      messages: [
        {
          role: "user",
          content: messageParts,
        },
      ],
      system: "Generate bold, high-contrast YouTube thumbnails with minimal text, clear focal subjects, vibrant colors, and strong visual hierarchy. Ensure the design is eye-catching, readable at small sizes, and aligned with the video’s theme.",
    });

    for (const file of result.files) {
      if (file.mediaType.startsWith("image/")) {
        return Response.json({ imageUrl: file.base64 });
      }
    }
  } catch (error) {
    console.error("Error generating image:", error);
    return createErrorResponse(error);
  }
}
Important
generateText function helps to generate the images; we can pass models, messages, and system prompts to this function.
Also, for handling API requests properly, create request-utils.ts file in lib directory.
export function createErrorResponse(
    error: unknown,
    options: {
        includeDetails?: boolean;
        customMessage?: string;
        status?: number;
    } = {}
): Response {
    const {
        includeDetails = process.env.NODE_ENV === "development",
        customMessage = "Internal server error. Please try again later.",
        status = 500,
    } = options;

    const errorMessage = error instanceof Error ? error.message : String(error);

    return new Response(
        JSON.stringify({
            error: customMessage,
            type: "internal_error",
            ...(includeDetails && { details: errorMessage }),
        }),
        {
            status,
            headers: {
                "Content-Type": "application/json",
            },
        }
    );
}

/**
 * Creates a standardized success response with optional data
 *
 * @param data - The data to return
 * @param options - Optional configuration for the response
 * @returns Next.js Response object with proper formatting
 *
 * @example
 * ```typescript
 * return createSuccessResponse({ message: "Success!" });
 *
 * // With custom status
 * return createSuccessResponse(data, { status: 201 });
 * ```
 */
export function createSuccessResponse(
    data: unknown,
    options: {
        status?: number;
        headers?: Record<string, string>;
    } = {}
): Response {
    const { status = 200, headers = {} } = options;

    return new Response(JSON.stringify(data), {
        status,
        headers: {
            "Content-Type": "application/json",
            ...headers,
        },
    });
}
Step 4: Set up the .env.local file
Create an API key from AI Gateway and add it in your .env.local file.
AI_GATEWAY_API_KEY=YOUR_API_KEYAnd Done, your YouTube thumbnail Generator is ready. Test it and try generating the YouTube thumbnail. You can also attach the image if you want your face to be included in the generated thumbnail.
Below is the demo of how the YouTube Thumbnail Generator will look:

For your reference, here is the complete github repository for code.
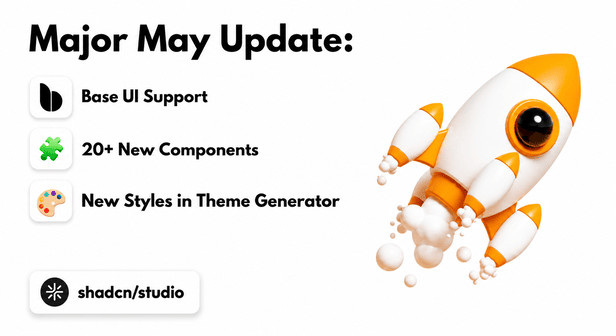
Special Recommendation: shadcn/studio

This isn’t a traditional component library or a replacement for Shadcn. Instead, it’s a unique collection that offers customizable variants of components, blocks, and templates. Preview, customize, and copy-paste them into your apps with ease.
Building on the solid foundation of the Shadcn components & blocks, we’ve enhanced it with custom-designed components & blocks to give you a head start. This allows you to craft, customize, and ship your projects faster and more efficiently.
Features:
- Open-source: Dive into a growing, community-driven collection of copy-and-paste shadcn components, Shadcn blocks, and templates.
- Component & Blocks variants: Access a diverse collection of customizable shadcn UI blocks and component variants to quickly build and style your UI with ease.
- Animated variants with Motion: Add smooth, modern animations to your components, enhancing user experiences with minimal effort.
- Landing pages & Dashboards: Explore 20+ premium & free Shadcn UI templates for dashboards, landing pages & more. Fully customizable & easy to use.
- shadcn/ui for Figma: Speed up your workflow with Shadcn Figma UI Kit, blocks & templates – a full design library inspired by shadcn/ui.
- Powerful theme generator: Customize your UI instantly with Shadcn Theme Generator. Preview changes in real time and create consistent, on-brand designs faster.
- shadcn/studio MCP: Integrate shadcn/studio MCP Server directly into your favorite IDE and craft stunning shadcn/ui Components, Blocks, and Pages inspired by shadcn/studio.
- Shadcn Figma To Code Plugin: Convert your Figma designs into production-ready code instantly with the Shadcn Figma to Code Plugin.
Conclusion:
Building AI apps used to be complicated, but with the help of the AI SDK, it becomes simple and scalable. You no longer need to worry about provider-specific code or rewriting code every time you switch models. Add AI Elements on top, and you get a beautiful, production-ready UI for free.
The YouTube Thumbnail Generator we built demonstrates how easy it is to turn an idea into a real, interactive AI application. And this is only the beginning. These tools empower you to build chatbots, assistants, creative apps, multimodal tools, and more with minimal friction.